
 Tiếng Việt
 ไทย
ไทยMany people have dried squid at home but hesitate to grill it because they fear the outside gets scorched while the inside stays raw, or the squid picks up an unpleasant gas smell. Actually how to grill dried squid on a gas stove is not difficult, it just needs the right order of steps and proper heat control. The article below from Ola Squid will guide you in detail from selecting squid, preparing tools, to each specific grilling step, helping you get an evenly cooked batch of squid that is naturally chewy and sweet right in your own kitchen.
How to choose good dried squid for grilling
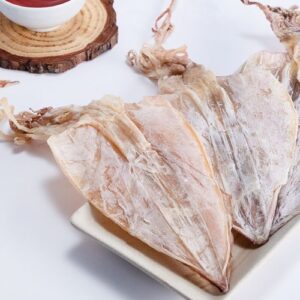
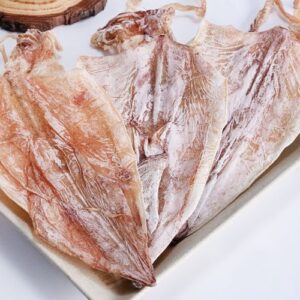
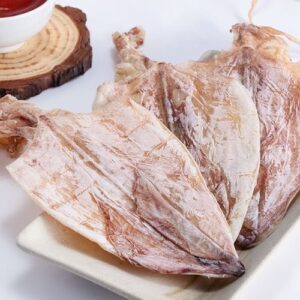
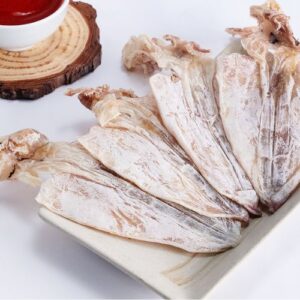
The quality of dried squid greatly affects the result after grilling. Good squid becomes fragrant when grilled, with meat that is sweet and moderately tender, not dry or overly chewy. On the other hand, low-quality squid often tastes bland, has mushy flesh, or still carries a fishy smell, and no matter how you grill it, whether on a gas stove or another method, it will not taste as good as expected.

When choosing dried squid for grilling, pay close attention to three factors:
- Thick body, firm flesh: when picked up, the squid should have a certain elasticity, not thin, limp, or flat.
- Dry squid, sufficiently sun-dried: the surface should no longer feel damp, dry to the touch, and not sticky.
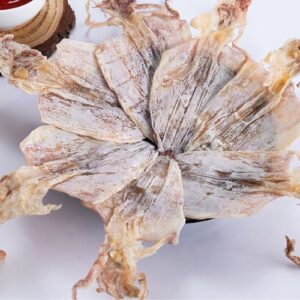
- Evenly coated white powder across the body, no strange smell: the natural powder layer appears evenly on the surface, and the squid should not give off a foul or musty odor.
If purchased at Ola Squid, dried squid is selected according to these exact three criteria before packaging, so buyers do not need to spend time checking each piece again.
Preparation before grilling dried squid on a gas stove
Before starting to grill, you need to fully prepare the tools and process the squid so the grilling goes smoothly. This step is often skipped, but if a suitable grill rack is missing or the squid is not soaked beforehand, it can easily turn out overly chewy or burn unevenly while grilling.
Ingredients and tools needed
The list below covers the minimum items needed before grilling dried squid on a gas stove:
| Ingredient / tool | Amount |
| Dried squid | 1-2 pieces (depending on number of people eating) |
| Beer | 100-150ml (enough to soak the squid) |
| Grill rack | 1 piece, sized to fit the gas stove opening |
| Tongs | 1 pair, long-handled to avoid burning your hands |
| Pestle (or the back of a knife) | 1 piece, used to pound the squid tender after grilling |
| Newspaper or plain paper | 1-2 sheets, to wrap the squid while pounding |
Soak in beer or warm water to soften the squid before grilling
Whole dried squid is usually quite tough, and grilling it directly makes it hard to cook evenly and easy to end up chewy. A common way to handle this is to soak dried squid in beer or warm water for 5-10 minutes before grilling, which helps the muscle fibers soften and cook more easily when exposed to heat.

Compared to soaking in regular warm water, soaking in beer helps remove the fishy smell better thanks to its light bitterness and low alcohol content. When grilled, squid that has been soaked in beer usually turns out more fragrant and has a nicer golden color than squid soaked only in plain water.
See more: A complete guide to soaking dried squid so it stays soft yet chewy
Detailed steps for grilling dried squid on a gas stove without burning it
Grilling squid on a gas stove has the advantage of stable, easily adjustable heat, but if the flame is too high or the distance too close, the squid can easily get scorched on the outside while the thicker flesh inside is still undercooked.
Step 1 – Separate the head and body before grilling
Use your hands or scissors to separate the head (along with the tentacles) from the body of the squid. Separating the two parts helps you control grilling time more precisely, since these two sections differ in thickness and require different cooking times.
Step 2 – Place the squid on the grill rack correctly
Lay the squid body flat on the rack, with the inner side (the side with a whitish color) facing down first so it makes even contact with the heat. Do not stack multiple layers of squid on top of each other, and grill only enough at a time so the flame can spread evenly across the surface.

Step 3 – Control the low flame and safe distance
Turn the flame to low or medium, keeping the grill rack about 10-15cm from the flame. This is the step most often overlooked, yet it is the main cause of squid burning or picking up a gas smell if done incorrectly.
Step 4 – Grill the squid body, flipping evenly
Grill each side for about 1-2 minutes, flipping continuously so the heat distributes evenly and avoiding a situation where one side burns while the other stays undercooked. When the body turns from whitish to a light golden color and starts to curl slightly, it is a sign it is nearly done.

Step 5 – Grill the head and tentacles separately
The head and tentacles are thicker than the body, so they need to be grilled a bit longer, about 2-3 minutes per side. It is best to grill this part separately after finishing the body to avoid a situation where the head is still undercooked while the body has already burned.
Step 6 – Tenderize the squid after grilling
Once the squid is cooked, wrap it in newspaper or plain paper and gently pound it evenly all over with a pestle. This step helps the muscle fibers loosen, making the squid easier to tear apart and more enjoyable to eat, while the paper wrapping also keeps things clean and prevents squid bits from flying around.

More ways to grill dried squid:
- How to grill dried squid with alcohol, delicious and simple at home
- How to grill dried squid on an induction cooker, soft, sweet, and not burnt
- How to make delicious moi grilled squid, chewy and sweet in the traditional style at home
- Guide to grilling squid in the microwave, simple and detailed at home
Advantages of grilling dried squid on a gas stove compared to alcohol/charcoal/microwave
Each way of grilling dried squid has its own pros and cons, but a gas stove remains a familiar choice for many families thanks to its convenience and ease of heat control. The comparison table below helps you picture more clearly the differences between these common methods.
| Method | Flame evenness | Preparation time | Chewiness and sweetness of the squid |
| Gas stove | Even flame, easy to adjust | Grill right away, no need to build a fire | Cooks evenly, keeps natural sweetness |
| Alcohol | Weak flame, hard to adjust | Grill right away | Easily cooks unevenly |
| Charcoal | Even flame once the charcoal is glowing | Needs time to build up the coals | Fragrant with a smoky aroma but takes more effort |
| Microwave | Heat radiates from the inside out | Grills quickly | Easily becomes dry, loses natural chewiness |
Looking at the table above, grilling squid on a gas stove is clearly suited to eating right at home, without the elaborate preparation charcoal requires, while still keeping a better chewy sweetness than the microwave.
Notes when grilling dried squid on a gas stove
Besides the standard grilling steps, a number of real-life situations need to be handled separately to avoid ruining the whole batch. Below are notes drawn from actual experience grilling squid at home.
- Grilling squid straight from frozen: raise the flame high at first to thaw the frozen surface, then lower the heat as usual.
- Squid picking up a gas smell: keep the grill rack far enough from the flame, and do not let the squid touch the blue flame directly.
- Squid scorched outside, raw inside: keep the flame low, grill slowly, and flip evenly instead of rushing to raise the heat.
- Grilled squid turns hard, chewy, and difficult to tear: do not grill over too high a flame, and combine with soaking in beer beforehand so the flesh softens more.
- Squid cooks unevenly: separate the head and body before grilling, since the head is thicker and needs more time to cook through.

See more: Tips for making delicious grilled dried squid right at home
Suggested dipping sauces to pair with gas-grilled squid
A well-grilled batch of squid also needs a suitable dipping sauce to bring out its natural sweetness. Three familiar options that are easy to prepare at home include:
- Salt, pepper, and lime: a light sour and spicy flavor that helps balance the squid’s rich sweetness.
- Chili sauce mixed with sugar, garlic, and chili: suited to those who enjoy a strong, spicy, bold flavor.
- Mayonnaise sauce: mildly creamy, suitable for those who are not fond of spicy food.

Each dipping sauce brings a different experience, and you can try them one by one to find the flavor that best suits your family.
Mastering how to grill dried squid on a gas stove step by step, from selecting the squid, soaking it in beer, controlling the flame, to handling common situations, will get you a delicious grilled batch right at home. If you have not yet found a source of dried squid that meets the standard of thick body, firm flesh, and sufficient sun-drying, you can check out the products at Ola Squid to make sure your grilled squid turns out right from the very ingredients.